Showing posts with label HouseMade Cards. Show all posts

Wednesday, December 11, 2019

HouseMade Cards - a tutorial

Since we've been home I've had a hard time settling on a long term BIG project...maybe because there's been lots  to do before Christmas - shopping, baking, errand etc. I'm excitedly looking forward to  January and staying in one place for a while! Because I've been so easily led astray I looked for a smaller project that I could do in spurts that might suit my mood.
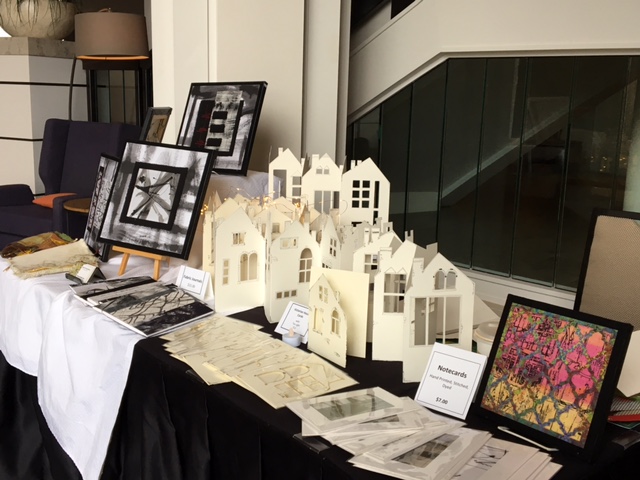
So I got out my box of card blanks and set up a little workspace to make more of my HouseMade Cards.....


For this project you'll need the following:
  •  a box of card blanks - I use Strathmore Creative Card blanks with a deckle edge, they come in cream and white and in boxes of 10, 25 or larger if you get really enthusiastic! You might find some other kinds
  • a small 6" ruler. I can't find my metal ruler with a cork backing (the cork keeps it from slipping) so I've been using an Omnigrid ruler
  • an art knife with #11 blade. A few years ago I bought a box of 100 blades, best investment ever!!!! as a sharp blade is essential and I put new ones in as soon as the old one seems a bit dull
  • pencil - mechanical or whatever you have
  • a white eraser
  • a couple Pigma or fine tip permanent markers
  • a little watercolour set with brush or watercolour pencils such as Derwent.

Mark the placement of the roof, windows and doors:
  1. On the inside of the card front, using a ruler with light pencil lines, mark the placement of the roof and chimney first.
  2. Then draw the windows, try different styles, sizes and arrangements and layouts. I find that two different groups of windows work best for balance, sometimes beside one another or on top or below. Its fun to experiment and you'll find that one idea leads to the next and so on....

Cut out the roof and windows

Use the art knife and ruler to follow your marked lines. Cut slowly and watch carefully where you want to stop and start. Once you've finished cutting, use the white eraser...gently...to remove the pencil lines.


Turn the card over and using the fine tip marker, add details to outline and emphasize the roof, chimney and windows. Add some brick work, cracks, and details as desired. If you have a planned recipient, add their house number or other particulars. Have fun and be creative!


Add Colour

Keep the intensity quite pale and add colour with watercolour paints or with pencils. My approach is relaxed and a bit rough but you might prefer a little more control. You could also add ivy, flowers or bushes!
Once finished and dry, I put a label on the back and slip the card with the envelope into a plastic protective sleeve. Now it's ready to give to a special friend!


One more idea -  use a little battery light and put the card onto the mantle for Christmas.... These cards were made for my Etsy Shop but I couldn't photograph them properly...that task is planned for the new year, learning to take the best photos possible!


Tuesday, October 17, 2017

Artist in Residence - No Sleeping Allowed!

What comes to mind when you think about an "artist in residence"? Maybe living in a remote national park with moose and marmots for company? Or working at an art school with vigorously engaged students creating along side? Or how about a space in a luxury downtown hotel?

Yup, I got picked as Miss October at the Delta Oceanpointe Resort for the Artishow programme here in Victoria. The Victoria Arts Council has set up a "Artishow" for local artists to showcase and demonstrate their artwork in four of Victoria's most prestigious hotels .....ok, but not The Empress!


Now before you get all excited - let me tell you I chose October, and I knew it would be quiet, because my summer months were taken up with family commitments. But even in October, Victoria is a tourist destination and I've met some very nice people from Calgary, San Francisco (he lost a second home in the recent California fires), Mexico and Montreal!

So three of my large pieces are on display on the Mezzanine - if you happen to stop by, that's up the large stair case. And I have a table to display and demonstrate my work. My focus for the month was to work on smaller pieces that didn't require and paints or dyes and I didn't want to bring my sewing machine (I was afraid I might get asked to hem some pants!) So I knew there would be some limitation but I've been quite excited to have large chunks of time with out the distractions of other errands that might pop up. I tend to be a "flitter" when it comes to working in my studio so I can easily distract myself from tasks at hand!


I trialed a couple of ideas, combining paper and fabric into books - not quite what I was looking for but they helped me to fine tune some ideas....


I've been working on simplifying my designs into what I'm calling my "HouseMade Cards and HouseMade Books" - cut out and illuminated houses from paper. I'm so pleased with the cards I've put them into my Etsy Shop: HouseMade Cards


I have two more weeks of my "Artist in Residence" left and I'll continue to work on my HouseMade cards, I have a Studio Tour coming up in Novemeber so I can build some inventory!


What else has this residency taught me? I've learned a little about the ebb and flow of life around the hotel: the airport shuttle comes by about every 45 minutes. The coffee shop (with Starbucks coffee) closes at 2pm. The bar starts to fill as I'm leaving at the end of the day. Conference meetings break out at 12 sharp, but they are busy with their own groups and rarely look up from their "tech" devices! People in the neighborhood stop by as they walk through the hotel, often with little dogs in tow.
Plus I have an amazing view of the Inner Harbour from my work space.


Stop by if you are in the area: Wednesday-Friday 10-5pm! Delta Oceanpointe Resort
There's some cool fellows hanging out there as well!


Oh yeah - the "residence" part of "artist in residence" is a bit of a misnomer - I go home to my own bed each night!