The last couple months have been quiet in some ways...I've not being creating a lot of new work, mostly getting small items ready for summer gift shops, finishing some half started work, entering a few shows and having a ton of fun with our grandchildren! Swimming, walking, kayaking and just hanging out at the beach.
But....after a long hiatus of teaching due to some amazing travel opportunities, I returned to the classroom and spent three wonderful days at Quilt University with the Ann Arbor Quilt Guild.
My first workshop was Colour Blocking - using thickened dyes through a silk screen and printing onto prepared fabrics. It was so much fun - enthusiastic students, a great workspace and wonderful printing!
You can see the wonderful combinations possible when mixing the dye on the screen.
Lana marked the fabric with yellow before screening on top.
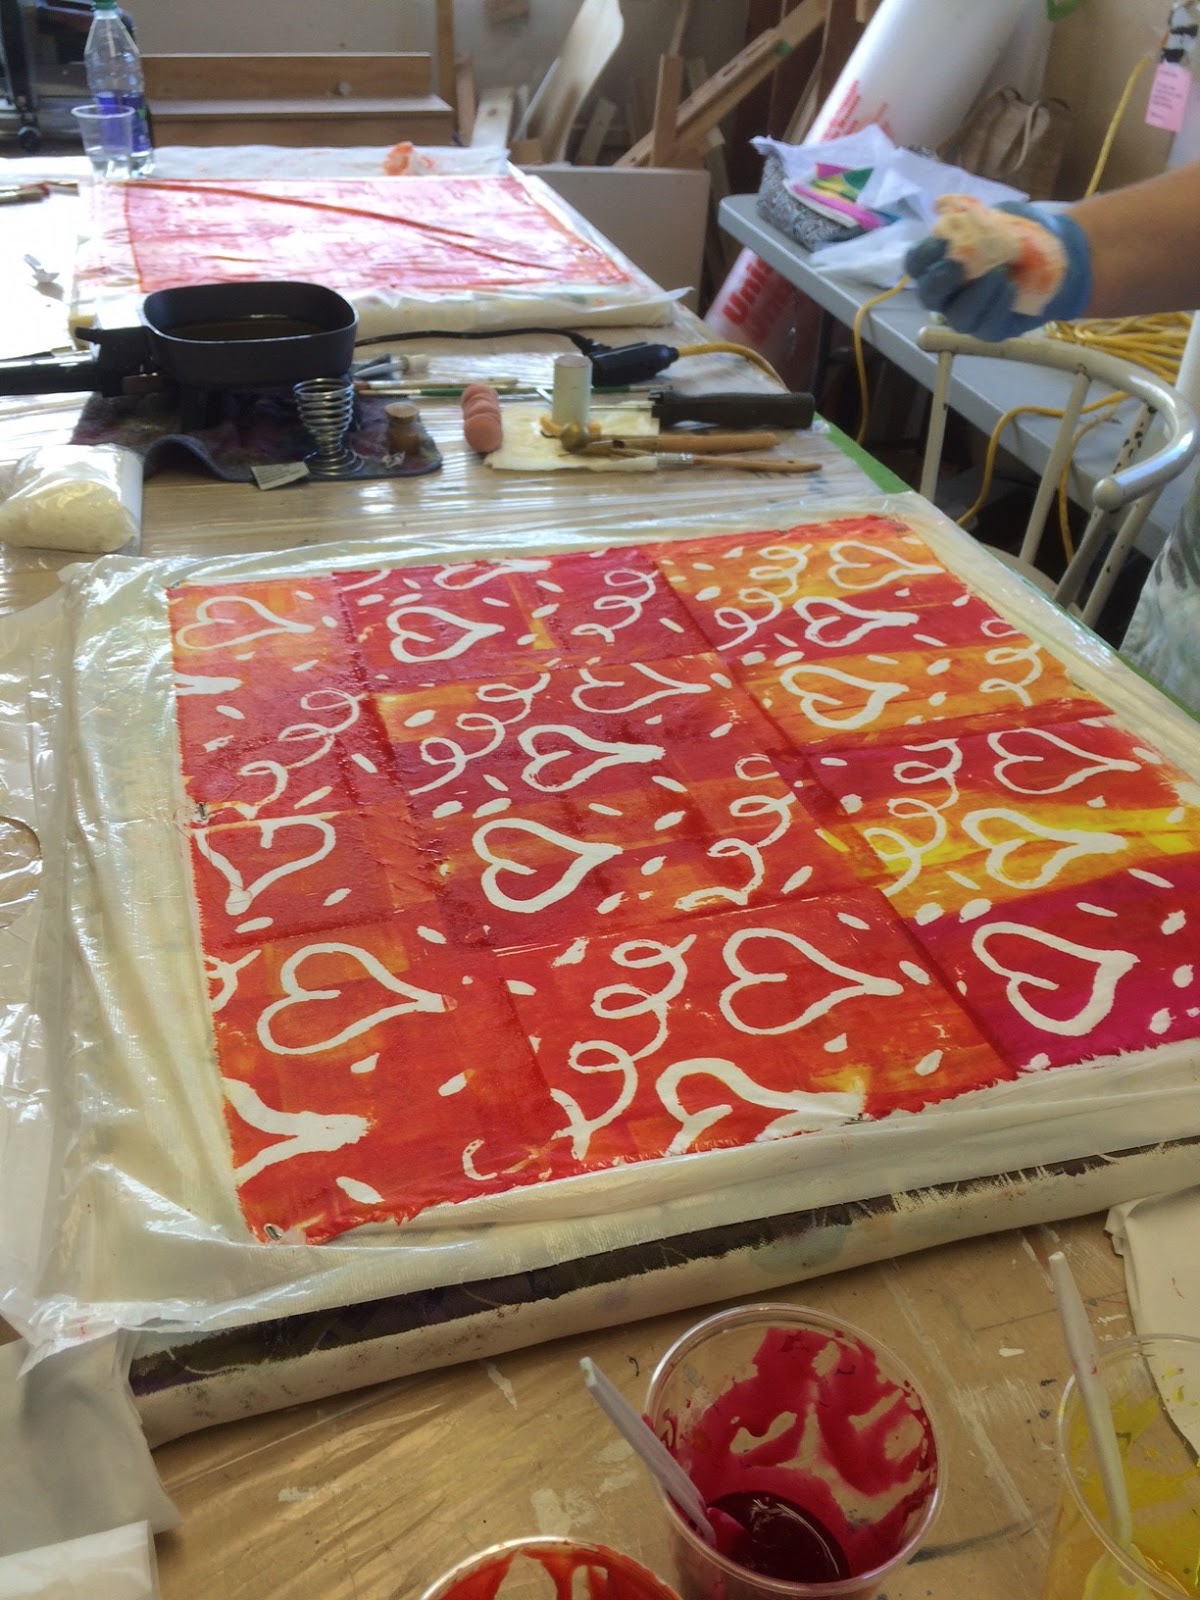
We pin the fabric on a print table to keep it stable.
Arlene has a great colour combination going! Analogous colours are a great way to start.
Dee Dee is drawing onto the fabric prior to printing - another technique choice!
It's possible to move the scraper to create patterns!
I supplied the students with fabric that I'd painted with black paint. since the workshop was just one day it worked out very well to have something extra to print on!
On Days 2 and 3 the students worked in Squiggle, Line & Dot Mark Making, learning a few of the limitless ways to put pattern and texture onto fabric and paper.
We begin by using just one tool to find as many ways as possible to apply black paint to white fabric...
Here's some of the ways you can mark with just one tool!
and here's a few more ways....
And still more....
Remember that there's such beauty in simplicity....repeating the same over and again creates timeless patterns!
We worked with black textile markers, they are so versatile! Did you know that you can buy refillable ones?
Sometimes we had to wait and let the fabrics dry...that was hard to do!
And not just black on white...you can work with white paint onto dark fabrics too!
I think all the students would agree that the most fun was working outside. Students taped their brushes to yard sticks or poles and let their movements make their marks! First we practised on paper...
And then we worked on two yard pieces of fabric!
Doesn't that look like fun!
On the second day we focused on using some of the fabrics for small books, cards, folios and such. I like students to leave class with more skills and ideas for creating their art!
I'm gradually moving my wide selection of online workshops to an "on demand" setting. Why? I'm finding that students want to access workshops when they see them, rather than waiting for a set date. Plus, I'm on the road a bit more these days and find a different selling platform to be helpful.
So, I've just finished setting up Colour Blocking within my Etsy Shop, meaning that you can get immediate access to the workshop as a downloadable lesson.
In Colour Blocking you will get a thorough PDF with hints, tips and dye recipes and a separate supply list with sources for buying dyes and chemicals.
There's a 40 minute video that you can watch at your convenience, plus you can download and keep the video for as long as you like...my workshops NEVER close!
You might be wondering what Colour Blocking is....? It's a term I use to describe the process of screen printing with thickened dyes rather than the more common textile paints.
Why thickened dyes....these dyes do not change the hand of the fabric, allowing the fabric
to remain soft and supple despite repeated applications, plus thickened
dyes are transparent, so layers of dye will change intensity, value and
colours, giving you a wide range of possible uses for their
created cloth.
The colours can mix within the screen during applications and you can also paint over the screened images so additional colours and values can be achieved.
It's also possible to mask out areas of the screen (I use soy wax) and create amazing secondary or layered imagery.
Circles painted on screen with soy wax
You can also layer fabrics, sheer organza on top and cotton or linen underneath and get fabulous depth of colours. Or mask out sections of the fabric with freezer paper.....
In the workshop you are welcome to ask questions and I'm only a mouse-click away!
Masking with soy wax plus mixing colours in the screen
All of this - plus enter the code: BLOGPROMO for 10% off the workshop....
Do you love dyeing fabric? Are you looking for a new way of creating luscious colour that changes across the surface, almost by magic? Curious about screen printing?
Then sign up for my Colour Blocking Online Workshop that begins on August 4th. In this workshop you will learn all the necessary steps to make amazing fabrics that will inspire you to create wonderful art.
In this workshop you will have a 45 minute video lesson (that you can download and watch forever), a printable PDF with all dye recipes and step by step instructions. In addition you'll be able to leave questions and comments on the password protected webpage. There is a private Facebook group to join, if you wish where other students share photos of their work and talk about their Colour Blocking projects.
So what is Colour Blocking? Its a way to use thickened dyes as a base for printing with a silk screen. Thickened
dyes do not change the hand of the fabric, allowing the fabric to remain
soft and supple despite repeated applications, plus thickened dyes are
transparent, so layers of dye will change intensity, value and colours,
giving the artist a wide range of possible uses for their created cloth.
I’ve been using thickened dyes for several years and love to screen
print with them in a technique I call “colour blocking”. By using an
open screen, with no images masked on the screen, I can achieve large
areas of one or several colors that can mix and combine on the fabric.
Students sometimes ask about fabrics....they wonderful part about Colour Blocking is its versatility1 You can use any fabric that works with Fibre Reactive dyes, so think of cotton, linen, hemp and silk. In fact any natural cellulose based fabric is perfect! Can't decide? Then why not layer some fabrics on top of one another! There's so many great effects that you can create with this technique, its not surprising its one of my favourites!
Are you thinking this is for you? After you register for the workshop, then check out my free video on making a print table, you'll need one for the workshop. You can get the video here:
Can't wait to get started? If you are a Quilting Arts magazine subscriber, then my article about Colour Blocking appears in the October/November 2014 issue!
I'd love to have you in my workshop, so sign up now and be one of the first to learn Colour Blocking!
You can get the supply list when you register and be ready!
I took a break from my series project to teach this morning and thought you might be interested in seeing some of what my students had created.
The workshop, which I call Colour Blocking, is working with thickened dyes through an open silk screen. This allows you to mix colours right onto the screen and create wonderfully rich combinations of values and open or closed areas. The fabric that is made is perfect for piecing, for applique or the addition of other surface design techniques.
Here you can see the blue and green laid down onto the fabric and mixing as the scraper is pulled across the surface of the screen. By rotating the screen horizontal or vertical designs will appear.
Sarah is so excited her hands are a blur! She likes the blue and magenta colour scheme.
Joan has the complementary colours to her shirt and has almost finished her piece of fabric.
Its possible to mask off areas of the fabric with freezer paper cutouts or to put soy wax on the screen to act as a type of mask. Many possibilities....
Are you interested in learning more? My online class will begin June 25th and registration will begin June 11th. Further information can be found: www.susanpm.com/online-workshops
Surface Design Workshops are in full swing here in Victoria, BC with lots of creative designs and beautiful fabrics coming out of the studio!
I have two more workshops scheduled for this month and there's still time to register. You can get the full details here:
/http://susanpm.com/studio-workshops/
Colour Blocking February 24, 2015 9:30-12 noon
Try screen printing with thickened dyes to create “colour blocking”!
By using an open screen, with no images masked on the screen, students
can achieve large areas of one or several colors that can mix and
combine on the fabric. These fabrics are perfect to use in piecing, as
backgrounds for appliqué or embellishments and clothing, Learn to use
value in an important way by changing the dye pastes to suit your needs! this technique was featured in a recent issue of Quilting Arts magazine.
Fee includes all dyes and chemicals. Your supply list will be sent when registration is complete.
$60.00
Gelatin Plate Printing (with a Gelli Plate)
February 26, 2015 9:30-12:00 noon
Create amazing prints on fabric without a press by using a simple
gelatin-like plate. Use stamps, art tools, bubble wrap, stencils and
more for exciting mark-making effects on your “Gelli” plate. Printed
fabric is perfect for small art, collage, cards and home decor.
Discover the excitement! Fee includes a 6″ x 6″ Gelli Plate to take
home, plus all paints and mark-making tools, your supply list will be
sent when registration is complete.
$60.00
Its been a busy, creative week. I finished the Studio Tour and had a marvelous time, lots and lots of people through and many positive comments. The Studio looked fabulous, it was tidy, with lots of art hung up and space to walk around. The hot apple cider was a hit, as well as the shortbread.....
I finally finished the quilting on my largest art quilt to date, its about 48" square(ish)and many times I wondered if the quilting would ever be finished? As you can see, its pretty heavily quilted.
Right now its back on the design wall, being blocked out. Then I'll put the backing on, do a light amount of stitching to keep the layers together, and add the binding and a sleeve. I have two shows in mind to enter with this and for once I might be able to submit before the very last minute!
When I'm teaching surface design workshops, I do a lot of demos! so I come home with piles of little samples....what to do with them? OK, I know I could always mail them to you! Instead, this year I bought a couple boxes of the cards with window frames and fused the little samples to a bit of paper backed web and slipped them into the frame. They were a bit hit, I almost sold out of them!
Have you got some scraps or bits that you think might work, then turn them into cards.
On my trip to Italy, I took over 1200 pictures, thank goodness for big media cards and iCloud!
I was particularly taken with the architecture, and today made a prototype for a new workshop and used some of my Colour Blocking samples. Just getting started....
If you are a subscriber to Quilting Arts magazine, then you've seen my article titled Colour Blocking - with Thickened Dyes! It's a very versatile technique that I'm super excited about!
One of
the many advantages of using fiber reactive dyes is their versatility, they can
be used in dye baths, flat dyeing,and
when thickened, can be used as a paint. Thickened dyes are suitable for screen
printing, stamping, working with stencils and freeform applications.
Their
advantage over acrylic paint is twofold, they do not change the hand of the
fabric, allowing the fabric to remain soft and supple despite repeated
applications, plus thickened dyes are transparent, so layers of dye will change
intensity, value and colours, giving the artist a wide range of possible uses
for their created cloth.
These fabrics, silk organza and cotton are layered together, then printed with thickened dyes.
Great effects are achieved when you use many colours for printing!
Intrigued? Then pick up a copy of the latest Quilting Arts magazine, or learn at one of my Studio Workshops I'm teaching in early 2015. You can read further details here: