Saturday, June 27, 2009
More Give and Take Applique!
Ann has done it again! Wow, she's coming up with some great designs. Here's her latest that is a Christmas table runner. She has suggested that she'll put some beads or buttons in the centre of each flower. And she's travelling in her RV too!
Way to go, Ann!
Friday, June 26, 2009
New Give and Take Applique
When I was in Duluth a couple of weeks ago, the students in my design class on Give and Take Applique produced some exciting new ideas. One student Ann, from Texas spends several months each year in her RV, travelling around and visiting friends. She has part of the RV set up as a sewing and quilting centre and doesn't have to leave her studio behind when they hit the road!
Ann emailed me to say that she has come up with several other great designs using out Give and Take Applique technique where we play with positive and negative images. Ann did a great job, plus its all finished and ready to use!
Great job, Ann!
Ann emailed me to say that she has come up with several other great designs using out Give and Take Applique technique where we play with positive and negative images. Ann did a great job, plus its all finished and ready to use!
Great job, Ann!
Thursday, June 25, 2009
Fun Fibre Days
I got home last night from two days of batik and deconstructed screen printing at Studio G Art
The first day we used soy wax for our batik, I'm totally sold on this product as it washes out easily, there's no smell and it doesn't smoke if too hot. I buy my soy wax at Dharma Trading
Luckily it was sunny outside so we were able to hang the fabric to dry. gloria, the owner of Studio G, treated us to a wonderful lunch on her patio and then we went right back to work!
Gayles work in progress, there's lots more to be done here!
Ann Marie tried the batik on a piece of chamois, we're excited to see how it turns out!
Mr Beetle came to visit too!
On Wednesday we began some deconstructed screen printing. Since the workshop was only one day I had prepared the screens a couple of days previous and we were able to get right in and have fun creating wonderful fabrics.
Gloria likes to work with big pieces of fabric-
Anne Marie begins working on her fabric-
We finished up the dye filled screens in the morning and then painted soy wax on the backs of our screens and pushed thickened dye through for more exciting printing!
Gayle had a blast and made great designs-
Monday, June 22, 2009
Stamping Monday
I found a page of corrugated paper in my studio that I had bought at a scrapbooking store. I thought the surface of ridges might work for stamping.
I also had a curvy blade to fit my rotary cutter, so I made some free form shapes and applied some paint with a brayer.
I think they look interesting enough for further exploration, especially other shpes that I could cut out and lots of overlapping images.
I might paint on some acrylic medium to help the paper stand up to a little more abuse!
Labels:
Stamping Monday
Sunday, June 21, 2009
Deconstructed Screen Printing
I've just finished a two day class today using Kerr Grabowski's method of "deconstructed" screen printing. Last week in preparation for the class I painted thickened Procion MX dye onto the backs of my silkscreens and let it dry.
On Saturday we began by pushing print paste (thickened sodium alginate) through the screens onto soda-soaked fabrics. The dried dye gradually breaks down and deposits onto the fabric. The resulting prints are very organic, multi coloured designs which are one of a kind and very exciting.
Susan had a blast!
They used cotton, silk noil, habotai, georgette and more. It will be fun to see the results once the fabrics are batched (time to allow the reaction to take place, usually about 24 hours) and washed!
We also painted soy wax onto the backs of the silk screens and pushed thickened dye through the screens, wonderful designs!
Friday, June 19, 2009
Little Baby!
We have deer on our island property, a lot of deer! If we wanted a garden it would have to be fenced, but that means more work, so we don't bother. We often drive up and find a couple sitting beside our front steps, they are not shy.
This little guy was tottering around the front yard then found a sunny spot to curl up and have a nap.
Wednesday, June 17, 2009
Minnesota Quilt Show
Last weekend I was in Duluth, MN for three days of teaching. It was probably one of the best organized, smoothly run shows I've ever been to. The staff treated the teachers exceptionally well, the students were a joy to work with and of course, the quilts were fantastic!
I taught Give and Take Applique for one day, we spent the morning playing with black and white paper, glue and scissors creating positive and negative designs. In the afternoon the students created their blocks using their designs into fabric. I think they did some exciting new designs!
The next day the students created blocks using my Empress Tiles technique from my Fat Quarter Frenzy book. They did an awesome job!
I had two groups of mothers and daughters in the class. Wanda and her daughters Missy and Laura had a blast!
Bonnie worked as the Elna rep in my classroom for all three days and she was a wonderful help showing all the students the cool features of the machines!
Tuesday, June 16, 2009
New Work
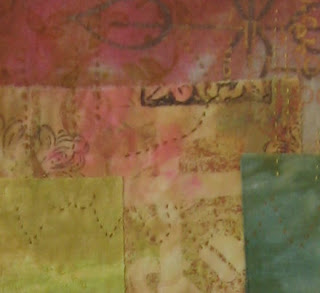
I made a couple more pieces for my show on Pender Island. These are more fabric collage than quilts, they are layers of fabric stitched down without any batting.
I loved doing the stitching by hand and just used running stitch and some cross stitch and hatch marks. I wanted them to appear like worn ancient textiles that might have been found in some archeological dig. I used dyed, screenprinted and stamped cotton and linen. Its also a great way to use up cut bits from other projects.
Monday, June 15, 2009
Stamping Monday
I've had this idea for some time and had just a few minutes to make the stamp. I've been using the top or backside of some of my existing stamps since I like to use any available space I can (my studio is getting a little cramped)!
I put two strips of double sided carpet tape on the back of one of my favourite leaf stamps. I had a bunch of bamboo skewers that I had broken in half for some reason. I think I'll be making lots of these because there's endless possibilities for placing the skewers.
Have fun with all the different design ideas this stamp can create!
Labels:
Stamping Monday
Tuesday, June 9, 2009
Photo Art
I have a small show on Pender Island starting on June 16th, so I've been preparing a few small pieces using pictures taken in Hawaii and Newfoundland.
I printed the pictures using Electric Quilt Printables-Cotton Lawn Fabric Sheets. I pulled out some batiks and handpainted fabric and played around with simple placements that included some piecing and applique.
It was a blast to see what each picture could suggest, I kept the designs simple and let the photos speak. Instead of making traditional little quilts I fused the pieced fabrics and pictures onto fusible stiff interfacing, Fast 2 Fuse. I also zig zagged around the edges, so they were easy to make and little fuss.
I think these would make great gifts and they could be a good project for a group....better get busy and amke some more!
Monday, June 8, 2009
Stamping Monday
Last Month, at Quilt Market, I found a vendor with stacks and stacks of colourful rick rack. Thinking I was very clever I bought two spools of white with the intention of dyeing all 48 yards of it! Sadly, after a few dye pots....I admitted that the rick rack wasn't cotton.
I figure that I can paint it with textile paints at some point.
But I thought it had interesting shapes so I put it on the back of some stamps with double sided carpet tape.
I stamped onto dyed fabric and made an interesting design by rotating the block.
I used a number of colours stamped onto white fabric several times.
I then made a second stamp with the rick rack in straight lines. I stamped discharge paste onto some stretchy black with an interesting texture in the weave.
I think I'll make a couple more stamps with the rick rack....after all I have 48 yards to use up!
Labels:
Stamping Monday
Monday, June 1, 2009
Stamping Monday is Back!!
Stamping Monday is back on the air! I had to take a little break due to a lot of travelling and other commitments, but now I'm charged and ready to go.
A couple weeks ago we had a large Douglas Fir tree removed from our back yard, it was interferring with the power lines and BC Hydro offered to take it down and cut it into fireplace lengths. We now have about 6 cords of wood that will last us a very long time!
I noticed that the ends of the wood were fairly even and some had interesting texture.
So I prepared some painted papers and had fun stamping!
I picked a piece of wood that wasn't too heavy and at first I tried brayering on some paint but couldn't get enough of a print. So I resorted to brushing it onto the end of the log.
If I wanted to keep the stamp I would cut it a bit smaller!
I'd love to post more ideas from viewers so feel free to send me pictures and brief descriptions to info@susanpm.com
Labels:
Stamping Monday
Subscribe to:
Posts (Atom)