Showing posts with label dyeing. Show all posts

Friday, January 7, 2022

Week 4 in the Studio - I'm Starting to Like This....

While in the studio today, I was thinking about what to post in this blog and finding myself looking forward to it! Normally I'd be dreading what I could write about...now I'm excited by what I've done  - not much this week.

Let's see...we had a snow storm...and I forgot to take the pretty pictures!

Then a day without power, although I did a Zoom call using the hotspot on my husbands cell phone - not great, but it got done!

So just a couple days in the studio - trying things out, experimenting and testing!

First I prepped some tubes for shibori dyeing ... and no, I did not drink all of that!

and did a couple of colours....I have a mostly unused lamp that is good for drying the tubes. The fabric will have at least one more dye bath but they have to dry in between.


Then I painted some papers, getting ready to make some vessels for an upcoming show. Lots of ink and using masking fluid for lighter lines.


The papers were combined with dyed silk into a vessel, a whole new learning curve! I searched on YouTube for paper bowls but didn't find what I wanted, eventually I looked for potters cutting clay slabs into different forms and tried out one shape, similar to a Maltese Cross! I found a few other shapes by the same potter that I'm excited to try!


The corners are cut out and then the edges are overlapped and stitched in place.


The bowl is very light and delicate and provides an interesting form - well worth further explorations!

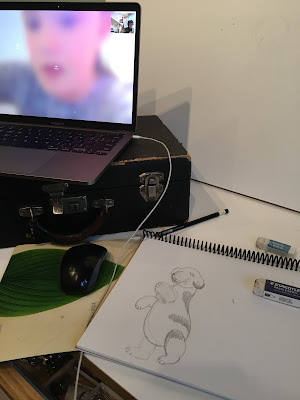
I also had a FaceTime art session with my granddaughter - do you like my puppy?


I had taken the black and white piece home (mentioned in my last blog post) and was excited to start working on some cross stitches in heavy black and white thread. After half a dozen stitches I realized that it wasn't what I wanted - darn!

So with a small square as a test piece, I stitched straight lines with invisible thread - didn't like the look of that!
I pulled out some variegated black/grey thread which turned out okay but I preferred the black/grey twist (both are poly threads) and by playing a bit I found I liked the diagonal lines that cross each other at an angle - sort of diamond shapes but the parallel lines are irregularly spaced. It's going to be a LOT of stitching! 
I want to test out the markers and see if they'll come out with water - the fabric had matte medium or gesso applied and I'm not sure if they'll be easy to remove!


And I revived the sourdough starter that had been at the back of the fridge for a very long time...I think this looks good!


Wednesday, May 11, 2016

Are You Wondering If It's For You?

I thought it was time to explain a bit more about my Online Workshops and in particular, my upcoming Ice Dyeing Revealed. I've been asked to elaborate......

As a surface design artist, I know you love colour and pattern…don’t we all! We understand the importance of subtle value shifts, repeating imagery and glorious contrasts….that’s why you are so creative! But maybe you are looking for a new method to add to your toolbox? Something that helps you move beyond anything you could imagine…..
I have a method of dyeing that is almost like Forrest Gump…..a surprise every time! By using ice as the carrier for dye powders you will achieve the most incredibly amazing patterns and textures, like nothing you’ve done before…


After this workshop you can build up a fabric inventory like no one else, each piece of fabric will be a new creation, ready for your artistic skills! You will be able to:
• create yardage, not just small pieces but long lengths of gorgeous fabrics
• dye coordinating patterns in different colour ways
• make home decor items, cushions wall hangings and more
• have a ready stash of fabrics for whenever you feel inspired
Doesn’t this sound wonderfully exciting? You bet! there’s a lot to be excited about!


So how does this work? Here’s a bit about Ice Dyeing Revealed workshop:
• First, you will have access to a password protected webpage that’s just for you. I’ll send out the password and all the tidbits the day before the workshop begins.
• There’s a place on the webpage for you to post questions and comments and to chat with all your fellow students.
• The webpage will also have the PDF of all the class notes – download it, print it and use it as a handy reference and reminder, it’s that simple!
• You have the option to join a private Facebook group that’s just for you to post pictures, see others inspiring fabrics and much more. It’s the best and most immediate way to get together!
• You’ll be able to download the video from the webpage, it’s yours to keep forever and ever, and ever….


Wondering about the whole “online” thing? Here’s some of those Frequently Asked Questions:
Do I have to sign in or be at my computer at a certain time?
      Nope, its all recorded before hand, you can watch it whenever you want….in your jammies with a cuppa!
When does the workshop start and finish?
      Ice Dyeing Revealed begins on the date on the webpage. I generally close off registration one week later so that all students get the maximum benefit from interacting with each other in the workshop and the Facebook page.
      I’ll give you a heads up when I am closing that session of the workshop, usually 2 months from the start date. That gives you time to download the video, just in case you haven’t. But you’ll always be part of the Facebook group, able to see the work from previous and future students
How do I know what supplies I’ll need?
      There’s a supply list ready for you just below, just print off and get ready.
Where can I buy the supplies?
      I’ve got a great resource list on the PDF with links to the major dye houses around the world
Do I need previous dyeing experience?
      Heck no! It’s all easy and I’ll be there to guide you through all the steps to beautiful fabrics.
What about safety? I don’t know what I’ll need?
      All the dyes and chemicals you’ll be using are safe when used in a responsible manner. I’ll spend time showing you how to set up your workspace and using some simple safety equipment.


What’s this Ice Dyeing about, anyway? All fibre reactive dyes need two things….well actually, three. First they need fabric, well yeah! Then they need a dye activator, that’s the stuff that make the dye permanent on the fabric. Then they need water/snow/ice to dissolve the dye and move it onto the fabric. If you’ve dyed fabric before, then you probably used water, right? Well, I live in Canada….the home of eternal snows, not! My climate in southwestern British Columbia is decidedly Mediterranean…no snow. So I have turned to ice as the next best thing…actually I think it’s the BEST thing. The ice acts both as a carrier of the dye powder as it melts but it also slows down and changes the reaction time so that the dye reaches different parts of the fabric at different times and that’s the MAGIC, folks!

In Ice Dyeing Revealed here’s what we’ll cover:
• the dyes and chemicals that you will use
• safe studio practices, how to set up your dyeing area
• equipment such as measuring cups, colanders and more
• getting the fabric ready for dyeing
• the “magic” folding patterns – it’s all in the folding!
• dye colour choices
• setting up the fabric, the ice and the dye
• batching time – be patient, young Luke…..
• rinsing and washing your fabrics
• getting excited!

Are you ready? What's keeping you back? Just let me know....
Or SIGN UP here:  http://susanpm.com/online-workshops/

I'd love to see you in class!

Friday, May 23, 2014

Free Dyeing Workshop!

There's lots of great information that you can access online, what to know something? Google it! Want to take a class? Sign up? Something to buy? There's Paypal! We love to be connected, there's whole universe out there with just a click of a button (or two)!
I've prepared a short video for you that introduces you to dyeing gradations of colour, those groups of fabric (and maybe threads) that dye from light to dark in value. You can't have too much dyed fabric, right?
Well, now its time to learn just how simple it can be! You can check out my video and learn the basics of Colour Gradations:


And if you love that one, then I have a 45 minute video on a variety of dyeing techniques and so much more....Check it out here: http://susanpm.com/online-workshops/

Wednesday, May 21, 2014

Five Easy Dyeing Tips That You Need to Know!

    Often I hear from students that they would love to try dyeing fabric but they think its a long, involved, messy process. Sometimes they think they need very specialized equipment, noxious chemicals and a large space in which work.
    In truth, a table or the top of a washer/dryer and easy access to water are the only necessities. I've been making luscious hand dyed fabrics for many years and tried just about every technique possible and the fact is, you can do a lot with very little!
    Here are some tips to make your dyeing experience fun....and easy!
  1. make a dye concentrate
Instead of making up a dye solution each and every time you want to colour some fabric, mix up your colours in easy, ready to pour concentrates. I mix 8 ounces of water, 1/2 teaspoon salt, and 1 teaspoon dye powder (double for lemon yellow and black) and keep them all in squeeze bottles, ready to go. They'll keep for 4-6 weeks, longer if you refrigerate them.

    2. always have fabric prewashed and ready to dye
That's a no-brainer....buy it, wash it! Its that simple!
    3.  dye threads and fabric together
If you are dyeing fabric, throw in a couple skeins of embroidery floss, some perle cotton or whatever! See how amazingly gorgeous it is??


    4.  make colour gradations
      If one yellow is beautiful, then think about how much better having twenty yellows could be!! Make more, make more! If you are not sure how, then check out my free video workshop here:

        5.  ok, here's the last tip....................make a trip to the dollar store of most of your supplies!
    You will probably need some measuring cups and spoons and maybe a water jug or two. Never use the stuff from your kitchen and the cheapest deals are as close as the dollar store. While you're there you might find some great items for stamping on fabric, some birthday cards and gift wrap, cute hair barrettes for the grand daughter,  new pots for the garden, socks for the neighbor, storage bins for the kitchen and.....well, you get the idea!
    Have a good one!

Tuesday, February 18, 2014

New Fabrics

Last week I spent some time dyeing up half yard pieces. Today I got them listed in my store. Lots of creativity happening in my dye room.....


Come by and take a closer look: http://fabricimagery.com/category/yardage/

Wednesday, February 5, 2014

Colour Play!

Last week I ordered a 25 metre bolt of white PFD (prepared for dyeing) fabric. I used it all up in less than a week! Its been a dyeing frenzy around here, with colour, dye, rinsing and washing happening at all hours of the day and night. Actually I had a great system of dyeing a batch first thing in the morning and rinsing it in the afternoon and then dyeing more and having it ready to rinse in the morning before beginning the dye process all over again.
I was concentrating on half metre pieces and doing colour gradations as well as some planned colour movements. I'll be taking all these with me when I'm lecturing this month for my own Victoria Quilters Guild and next month for the Boundary Bay Quilters Guild.
What do you think of these beauties?


I added threads to some of the fabrics in my colour gradations and made up these totally awesome packs that I've added to my store. So you can order them here: http://fabricimagery.com/category/colour-play/
I've got five colourways right now but will be adding more as I create them. Each pack contains four 11" x 18" fat eights and four 10 yard skeins of perle cotton, all packed up just for you! You can't stop at just one!


Wednesday, December 11, 2013

Online Learning with Susan!

After a very steep learning curve, the FIRST part of my Online Workshops is up for viewing! I am thrilled to be able to offer a variety of Surface, Design, Dyeing and Printing Techniques for my students.
I love to teach and share with you but I can’t always be at your guild or conference. So I’ve developed the next, best way to inspire you. So, invite me into your home or studio to learn new ideas and techniques.

You can see a short video at:  http://susanpm.com/online-workshops/
Pictures from Print It, Print It!

 My workshops are multi-lesson formats that combine PDF documents to print out – such as dye recipes and resources – and videos for you to watch and learn exactly so many of my techniques are done. You can watch them at your own pace, download them for future reference and work alongside me or take notes with a cup of coffee beside you! There will be opportunity for you to ask questions and post pictures and to meet other students and chat.
Pictures from Colour It, Fuse It!

 Each workshop will be open for six months from the start date and you will be able to keep the links to the videos forever.
Browse through the workshops below, see which dates fit your calendar and sign up! You are welcome to email  me with any questions. I hope you will join me on this exciting new adventure!

So check out all the details at:  http://susanpm.com/online-workshops/
Pictures from Screen Printing with Success!

Monday, November 4, 2013

The Printed Fabric Bee

So, its the first BIG REVEAL today! Are you excited to see all the wonderful fabric that Lynn Krawczyk got from the other bees? I sure am!
First, I'll show you how I made my fabric for Lynn. She had requested:

I'm choosing ORANGE CIRCLES. And for fabric size I'd like a rectangular shape - 10" x 14" (just under the 144 square inches but I'm good with it.)About the only thing I don't like color wise is pastels. I like neutrals (greys, browns, blacks) and strong vibrant colors. I'm a contrast junkie. And for the record? Light red qualifies as pink. I do like the 70s color vibe of brown, green, orange, gold. If that horrifies you, though, feel free to flee from it.

I began by dyeing a 1/2 yard of PFD. I used an orange with some bronze in the dye bath:

I sewed the fabric into a tube and put it on a PVC pipe with a rubber band at each end to hold it in place. I painted on some soy wax to keep the orange colour and then painted on an MX dye from Dharma Trading called Caffeine Buzz! 


I let that batch and also stamped soy wax circles on another 1/2 yard that I'd dyed. I thought that might be my back up plan! Here are the two fabrics together:


The next step was to use some of my Thermofax screens and print multiple circles on the yardage with black paint:

Finally I screen printed an image of tiny dots within a circle shape in deep mauve. Its a little difficult to see them:
 
Finally, I put it in  an envelope and sent it on its way!
Now, all the "bees" put a little something extra in their packages....... so that maybe you can join in the fun! You could win a 6" square from each of us and have some creative time with our fabrics. Here's what you need to do: 
Hop on over to Lynn's blog:  http://smudgedtextilesstudio.com/blog/ and leave a note for her in the comments section. You can visit our Facebook page here: https://www.facebook.com/theprintedfabricbee and get more information and news! Be sure to "like" us....

Tuesday, September 3, 2013

Good, Better, Best

When my children were teenagers they would often play a game at youth group called "Good, Better, Best". The idea was to start out with an inexpensive item,  and by visiting neighbours, try to trade up for a better item. By the time they had finished the game they had acquired intriguing and often fun items to show at the group. The winner was chosen by which team had traded up to the "best" item. A well known variation of this game can be found here: http://oneredpaperclip.blogspot.ca/
What does this have to do with my work? Well, I had made a piece of fabric with soy wax resist, dye and textile paint. I had envisioned a vibrant and exciting result. What I got was this:


Not too impressive! My vision was very different from my outcome. But I always remember my textile design tutor telling me "when in doubt, do MORE" and I carry that thought often into my work. If a piece of cloth or quilt just doesn't excite me, very often it just needs MORE.
So back to the wax pot and a more intense layer of colour.


Once I washed the wax (remember, its soy wax, so cleaning is easy) and dye out, it was much better. But not quite good enough, it needed MORE!

This time I went back into the fabric with textile paints and a thermofax screen. I printed in bright magenta and then rotated the screen and printed again with vivid pink. This is the screen design I used:
Now I'm happy, I think the fabric is the best it can be. I think you'll agree that doing MORE is worthwhile. When have you found that doing MORE gives you MORE than you expected?


Tuesday, June 25, 2013

Cool Tools - Paint Markers

My friend Marny introduced these markers to me and after ordering them, they sat around in my dye room until this past weekend. They are called Molotow Empty Paint Markers and you can order them here from Dick Blick: http://www.dickblick.com/products/molotow-empty-markers/?clickTracking=true

They must be designed for graffiti artists as the label on the markers states: use marker for art, not vandalism! I'm an artist....some might say my work should be vandalized!
I think almost any paint or dye could be used, I think textile paints such as Jacquard would need to be diluted a bit. I used Dye Na Flow and did dilute it by about 50% but also used it full strength and it came through the felt tips just fine.
Filling the markers was a bit of a challenge at first, I didn't realize that not only the top needed to be removed but also the valve that controlled the flow. Once I had done that I used a cup to hold the marker still and carefully poured the paint into the reservoir. There are two glass ball bearings inside to keep the paint mixed.

I began by pinning my fabric to the paint table but found that it moved too much when using the marker, I needed to push down on the felt to open the valve and start the flow of paint. I solved this by ironing the fabric to freezer paper and pinning it all to my print table (the yellow blob on the centre-left was when I forgot to replace the value that controlled the flow!)

I loved the wide 60mm. marker, I could see making large swoops and circles with it. The narrower 15mm wedge was great for a variety of lines as well and the narrowest one at 2mm was perfect for lettering and finer detail.

So are these any different from other commercial fabric markers? Well, for one, you can custom mix your colours, so you aren't having to use just what the manufacturer  provides. You can also use a wide variety of products.....whatever can flow through the felt tips can be used, paint, dye, bleach or?? Finally, I do love the wider tips, they appeal to my inner graffiti artist and I promise not to vandalize anything but my own art!


Tuesday, May 28, 2013

Dye Another Day!


How often you you get inspired with a new dye colour or idea and want to rush to the pots eager to try it out? Then discover you have to make up the soda solution and dye concentrate before starting? Maybe you only have 30 minutes and would love to try creating a new rich, soft brown with tints of red?
Why not make up the solutions and have them ready for when the inspiration strikes?
I have dye concentrates made up in 12 ounce squeeze bottles in two sets of primaries, plus a few extra colours and store them in my dye room. The room is cool all year round, but if your space gets warm, then invest in a small bar fridge.
I generally buy my dyes twice a year and make fresh concentrates every 3-4 weeks, more often if I'm having a particular colour splurge!
I buy my dyes from www.dharmatrading.com, they ship quickly and I like their service.
The colours I have are:

Cool Primaries                      Warm Primaries
Fuchsia                                    Scarlet
Lemon Yellow                        Golden Yellow
Turquoise                                Royal Blue

And I add in Bronze, Purple, Black (sometimes 2 or 3 different ones)' Avocado, Moss Green and Eggplant. I often will try a new colour and see if I'd like to add it to my palette, but generally am happy with this selection.

Here's the dye concentrate recipe I use:
Dye Concentrate:

            1 cup Chemical Water
            1 Tablespoon Procion MX Fiber Reactive dye powder
            Stir dye powder into Chemical Water until dissolved
            * I generally double the amount of black for intensity

Chemical Water: Urea is a wetting agent that keeps the dye solution from drying too quickly. This is important when laying the fabric flat to batch. Use this recipe for making the Dye Concentrate and Print Paste. The solution will keep indefinitely.
            4 cups lukewarm water
            9 Tablespoons Urea Granules
            Stir Granules into the water until dissolved.

I measure fairly accurately, but I know to get repeatable results it would be best to weigh my powders. I make little funnels from strips of paper to fit into the neck of the bottles, plastic funnels would work but I'd need one for each colour if I'm making multiple colours.

I make the soda ash solution in jugs or plastic bottles so that its ready to pour into cups with the dye concentrate:
Soda Solution:
            2 quarts lukewarm water
            4 Tablespoons soda ash
            Stir powder into water  until dissolved, soda ash will often take a little while to  dissolve thoroughly.

 Safety First!
·         Always wear a mask when working with dye powders.
·         Do not drink or eat in the dye area.
·         Reserve all equipment to use only with dyes and paints.
·         Label all dyes and chemicals clearly.
·         Work in a well ventilated area
How do you like to mix your dyes?