Showing posts with label studio design. Show all posts

Monday, November 16, 2015

Your Personal Studio Tour

This past weekend I had dozens of friends and strangers walking through my studio to see my art work as part of the Oak Bay Studio Tour. It was fun, it was affirming and it was exhausting! I was in bed by 8:30 last night....
Of course when you embark on having the studio open, it needs to be spiffy and neat, so everyone is impressed with my work space. I'd love to say that its like that all the time but sadly, thats not the case....
So before it goes back into its normal state, I thought you might like a tour.

Here's the entrance area into the studio, there are stairs from the upper level to the right:

Then a look into the studio, it's in the basement without much natural light but lots of good fixtures for a bright and cheerful work environment:


To the left, there are two bookcases, filled with books, reference material, small bits of things...I can see some tidying is needed...


To the right of the bookcases is my cutting table and my design wall. Where the yellow art quilt is (my #2 favourite) usually has a bulletin board: the art on the right is in progress, visitors enjoyed seeing the way I work and considerations for my design decisions.
 
Here's another view of my cutting table, I love the drawers and shelves....its an Ikea kitchen island! Another spot to tidy underneath...

The right side of my design wall, the wall is about 6' x6', I'd love it to be larger but that's all the space I could manage. My work "Appia" is on the wall, but usually theres another bulletin board.

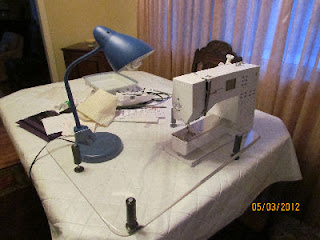
My sewing machine is underneath the table, I love the mechanized lift for it. I often put it down and use the space as a light table.... You can also see a wall shelf that's handy for putting bits and pieces and more art above it.

The one window in the room looks out onto grass and the neighbour, not the best view but it is south-facing so there's good light. You can see the "office" too. The open area to the left was meant to be an "art" area but thats not too practical, I might try again, not that its tidy....

Here's more of the "office" with "Lupine" in the background, thats usually another bulletin board space :) My Thermofax machine is below.

Here's my fashionable fake fireplace, just an electric one but it does have nice fake flames too! The fabric on the left covers my printer that usually sits on the table. More art on the right!

Here are the Ikea wire baskets that store my fabrics and projects. In front is another Ikea kitchen island that is my pressing surface and it usually lives somewhere else. I had my ice dyed scarves set up on the island with a mirror for the Studio Tour.

Then finally, we have gone full circle with another set of bookcases that store books, beads, boxes and more.... the door out of the studio is on the right.

Thanks for stopping by, if you're ever in the neighbourhood, let me know and you can see it for real! But I can't promise it'll be this tidy. Now I have to get the bulletin boards back up!

Monday, February 4, 2013

Quilt Studio Tour

Last year I helped to organize a very popular guild event to raise funds for our workshop programme. Having spent a great deal of time during the previous 18 months designing and then renovating my own studio, I thought it would be a lot of fun to visit other quilters work spaces.

I thought that we are always curious about how other people use their creativity at work and given the huge popularity of home reno shows, it might be a fun time.

The committee chose 6 studios with a variety of spaces, some purpose built, some squeezed into spare rooms, basements and lofts. One quilter used three different rooms over two floors! We chose a long arm quilter, a mixed media artist, a business studio and more, it was fun taking the time to be part of poking around in our friends work places!


Daphne's studio showcases her journal quilts and small art pieces.


Lenny's studio is bright and full of windows looking out onto her beautiful garden.


Bette is showing us her custom built fabric storage drawers.

 
Sharon's studio takes full advantage of every square inch of space!

 
Laines' space downstairs is where she works on her painted and photographed pieces.

Wednesday, September 19, 2012

Five Essential Studio Tools!

If you know me you'll agree that I do like, and am easily distracted by bright, shiny things but I am a cautious shopper so don't have a lot of the latest doo-dads and gadgets in my studio (the kitchen is another matter!)
Btu I wondered about some of the tools that I keep using over and over again that aren't necessarily quilt related. These are items I consider essential in my studio and perhaps you would agree. So, in no particular order, here they are:

Proportional Scale


This gadget is the answer for enlarging or reducing drawings, patterns, or anytime you want to change the size in a copier.
Its simple to use and saves paper and aggravation! You can see a short Youtube video here:
http://www.youtube.com/watch?v=Mi_6u338yhU

Sharps Container


Sitting in the doctors office a couple years ago, led me to think about all the bent pins, broken needles and dull blades I have thrown out over the years (I've always wrapped the blades in cardboard before disposing of them). So I started my own little Sharps Container and have another one in my workshop kit for travelling. Once the container is full I cover the lid with masking tape and put it in the garbage. Hopefully I've made the landfills a little safer!

Camera Tripod


I take a lot of pictures in my studio of work in progress and finished pieces. I take pictures of my dye work for Facebook and my blog.
Last Christmas I got a tripod from DH and love it! It keeps the camera steady, as even the slightest tremor can distort your images and I found a small table mini-tripod for small pieces of work.


And as another tip: I take my camera and a hiking pole out on walks with me, the handle on the pole unscrews so I can mount my camera for a monopod!

Colour Tools


I work with colour all day, I've taken many colour courses, have lots of books about colour in my library, but find I don't have a good colour memory!
So I often rely on these tools to help me when working with dyes or fabrics. They are indispensable in my studio. I often pick up those palette brochures and paint chips at the hardware store as well, they are fun to play with!


Idea and Inspiration Boards


I find that any piece of paper, photo, magazine article or snippet of something that lays on a horizontal surface will disappear within minutes. But once its pinned up on a board its more likely to stay there (though sometimes the papers do getting stuck behind other papers!)
So I have put up one very large board and not one, but two more boards as well! I can generally find what I want or needs within a minute or two instead of hours! Sometimes I even try to make them pretty and every couple of months I purge the boards of anything out of date.

So do you have favourite tools that you'd be lost without? Why not sure them with us!

Thursday, July 5, 2012

Choosing Studio Flooring

We tend to think of the pretty or decorative items for our studios when planning a renovation but one of the most critical elements of a good studio design has to be what we place on the floor. When looking at flooring, think of these critical elements:

  • Safety-we don't want flooring that we can slip or trip on
  • Comfort-we can often be on our feet for lengthy periods cutting fabrics 
  • Cost -what kind of flooring will fit into our budget

When I was planning my studio I considered many options, some were impractical, some too expensive, but I'd like to tell you about the possibilities:


Concrete/cement

Probably the least desirable choice, concrete is hard on your legs and feet, but anti fatigue mats could be used. It can be cold, but that maybe appreciated in hot weather. Concrete is easy to clean and can be painted in a wide variety of colours and patterns. It also maybe the only option if you are working in a garage.


Linoleum

Lino is probably the cheapest option, it can often be installed by a non-professional, there are almost limitless design and pattern options. You might consider the peel and stick tiles.


Carpet or carpet tiles


I had carpeting in my basement studio for many years, it was warm but I had chosen a creamy beige Berber that showed dirt, threads and stains very easily. I usually steam cleaned the carpet once a year and vacuumed frequently but pins and beads were often lost "forever"!

If your studio does double duty as a guest room, then carpeting might be the only option, I would recommend a medium light or darker value and remember a loop pile will often grab hold of pins and not let them go, even with vigorous cleaning!

If carpeting is your best option then consider the peel and stick carpet tiles as a less expensive option.


Rubber


Rubber or composite flooring is often found in gyms or play areas for children, it is rather expensive. It is very easy on the feet and legs, although colors are limited. It will be marked or dented by heavy furniture.


Cork
Cork has many redeeming qualities, it is warmer than other laminate or wood floors, it's a renewable resource, and it has some cushioning properties. Cork flooring was my first choice for the floor in my studio. Unfortunately, the cost of 324 square feet with underlay was going to be over $2500.00, too high for my budget.


Hardwood


Perhaps your studio is in an older building and you are fortunate to have some sort of hardwood flooring. Lucky you!  If you have it in your budget, it might be an option, however if the flooring is varnished or treated it might be susceptible to scratches and marking. 


Laminate

Laminate flooring was the final choice for my studio,  we purchased it on sale and also bought the best quality underlay we could find. Once we had taken up the old carpet, we discovered that the cement floor was terribly uneven, too uneven to lay the laminate, darn! Fortunately I have a talented son in law who laid a plywood subfloor to level it out. I was surprised that there was a 2" difference from one corner of the room to the opposite side. 

My husband laid the floor and I love the look.


Other considerations:


DIY or professional installation? Consider the cost of hiring someone to install your flooring if you don't want or are unable to do it yourself. Most flooring installation is fairly straight forward, but if you run into problems like I did, then going to the professionals might be your best route.


Additional flooring: consider placing anti fatigue mats in areas where you are standing for periods of time such as in front of the cutting table.


Place mats under chairs to protect surfaces and prevent wear in front of sewing machines and computers.

You can save money by using or repurposing furniture in your studio, but don't skimp on flooring, buy the best that you can afford. It will pay off in years to come.


Wednesday, June 20, 2012

Studio Reno is Done! almost....

I'm thrilled with my new studio and have enjoyed working in it the last few days! I learned:
  • renos take twice as long as expected
  • little issues along the way cost the most!
  • the decorating will take time
  • many wonderful people made it all possible...thanks to Henry and Sean!
Here's some pictures of the studio finished but empty, ready for the 'stuff'':


The floor space measures about 250 square feet, there's just one window but lots of wall space. I choose Navajho White (Benjamin Moore) for the walls and the brick and accent wall was Terra Red, why be shy?

I'll write another blog post about the flooring choices.

The lighting is all natural tube and I have a couple of other lights in work areas. We've maxed out the electrical possibilities so I'll need to be careful about the demands.

Here are the finished pictures, just need to do a bit of decorating!


I love my little fireplace, the remote control is on top, just a click of a button and I can have roaring flames without heat! Or heat without flames, it'll be nice and cozy in the winter as its my only source of heat in the room. I'll be putting a rod at the top of the brick wall to hang quilts.


Desk area is under the window, there will be a large bulletin board on the wall behind the chair and the desk will be replaces by a proper L shaped work area with filing drawers underneath. I'll be buying mats today to protect the floors under the chairs.


My cutting table is my best purchase for the room. Its an Ikea kitchen island and was on sale for under $500. When we brought the boxes home I was very concerned that it would be too long at 72" but it fits very well and the storage is wonderful. My design wall is to the right and will measure 6ft wide x 5 ft tall. I lost a bit of height in the room because of the subfloor but I think it will work well.


This is another Ikea kitchen island, but I've modified it for my pressing table with a padded surface. It has wheels at one end so its semi-portable.


The bookcases are set up, there's till some boxes to unpack, so I'll be buying some more book cases, which I had planned on doing anyway. I used the height of the bookcases to take advantage of the bulkhead on the ceiling.

So all in all, I'm pleased with the results, there's still some tweaking to be done, another trip to Ikea, pictures and design wall to hang. But I can now work in the space after almost two months of frustration! I'll continue to post as changes are made, stop by and see me sometime!


Wednesday, May 16, 2012

Interview with Lois Hallock - Studio Designer Extraordinaire!

You may have been following the many trials and tribulation that I've been going through over the past few weeks as I endure a huge studio renovations. I'd like to say its all done and show you pictures.....but part of the sub floor is in and progress is being made, albeit rather slowly!


But I have spent a lot of time preparing for the reno, beginning almost a year ago when I first decided to move ahead. I had purchased Creating Your Perfect Quilting Space by Lois Hallock and spent a great deal of time going through all the chapters, gathering ideas, pouring through the internet and making many, many floor plans on gridded paper. I'll be continuing to walk you through the steps of my reno but I wanted you to meet Lois and hear what she has to say about how to create YOUR perfect quilting space:

Can you tell us a little bit about how you became interested in Studio Design, Planning and Organization?

I am one of those natural born organizers. I really enjoy figuring out the best way to arrange a room and the best way to organize stuff. It is like a big puzzle that has a best solution. I am an engineer and I have worked for over 20 years optimizing factory work by planning lean work flow, along with storing tools, plans, and supplies right where they are needed. These principles are universal and I found out that I saw things just a bit differently than other quilters as a result of these experiences. My book “Creating Your Perfect Quilting Space” was a combination of all my passions, organizing, quilting, and helping others.

What do you like best about your work?
I love helping people! It gives me great joy to hear from a quilter after she takes my class or attends my lecture, that I changed her life. Often the cathartic affect of improving her quilt studio, kicks off a highly productive and creative phase for the quilter. Sometimes these quilters go on to improve other rooms in their house. Others jump into a new activity, like teaching or hosting groups in their quilt study. One of my favorite stories was from Terry Martin, whose quilt studio is seen on the cover of my book. Terry shared with me that she felt isolated in her studio and that neither her teenage daughter nor her husband stayed very long when they dropped in. Well there were no comfortable chairs and the space was not welcoming to visitors. So we added a loveseat and TV, positioning Terry’s sewing table such that she could watch while she sewed. She said the first time she was watching old movies and sewing, her daughter stopped by and just sat down to watch with her. They chatted and laughed while enjoying an afternoon together. Terry said it was all worthwhile to spend quality time with her daughter.


How can I plan my studio before I start moving things around?
I highly recommend planning first before moving furniture. In my book I tell you to draw your studio to scale and cut out index card models of your furniture in order to try different layouts without moving furniture. Many quilters find my Quilt Studio Planner with scaled furniture models included and my half pica scale to be a great shortcut. I challenge quilters to create seven different viable layouts and take a photograph of each. Print the photos out and spend some time gazing at them and deciding which layout is the best (just like you would spend time deciding how to lay out your blocks on a quilt). Your husband or son will thank you for only have to move the real furniture once and being sure everything fits once it is moved!

What are quick things I can do right now to make my Studio work well?
1. Fold your fabric and store it on shelves where you can see it. I demonstrate fabric folding as a part of my lecture. Fabric is what inspires you to create quilts. You need to get that same feeling that you get when you walk into a fabric store when you walk into your own quilt studio. Fabric fuels your passion and energy, clutter saps it.

2. Sign up for my monthly newsletter at my website: http://www.clearview-designs.com/


What are the most common mistakes quilters make when planning their studios?
1. “Circle the wagons” – I heard this term when watching a HGTV show on home décor. It is used to describe positioning furniture against the outer walls of the room, leaving the floor at the center empty. It is as if the room was spun in a big centrifuge and the furniture was pushed to the outside. This is very inefficient use of space. The use of peninsulas and islands produce much better flow and efficiency.

2. Too much horizontal surface. Quilters think that the reason their horizontal surfaces are piled under is because they don’t have enough surfaces. Well the opposite is true. The more horizontal surfaces you have, the more you tend to pile things on them. Instead go vertical with storage. You will have a lot less clutter and be able to find things when you need them.

3. Furniture without storage. Quilters use ironing boards that take up floor space and provide no storage. Instead use a buffet or dresser with lots of drawers to hold your pressing surface.


4. Using poor ergonomics by having wrong height surfaces and office chairs not designed for sewing posture. In my book I tell you how to measure for good ergonomic heights. Be aware that office chairs do not come far enough forward to meet your back when you are in “sewing position”. I offer the Heavenly Sewing Chair at my website which is a fantastic chair for quilters. It is built custom for you with your choice of fabric. I had the pleasure of helping a consulting client who is also a medical doctor. She was blown away by the improvements she experienced when her ergonomic issues were resolved. She was amazed that with all her medical knowledge, it was simply choosing the right furniture that improved her quality of her sewing experience.

I hope you have enjoyed some of the ideas that Lois has presented to us, I know that I have followed many of her suggestions and found them to be so useful. I'll be addressing some of them over the next few blog posts and I hope you'll get some ideas as well.
 
PS. the photos above are not my studio!

Wednesday, May 9, 2012

Studio Renovations - Life Goes On!

I should have titled this post "Life Happens", last week I had to take a three day trip to Vancouver and the renovation slowed down, a lot. Now its ground to a complete halt.
The wall is completely down and has been insulated and dry walled, just waiting for the mudding and taping.....the guy said he'd be here on Monday, its now Wednesday. But "for sure" he'll be here on Friday, hhhmmmm?
The old carpeting came up and I went to Rona and picked out a mid range laminate for the floor. I really did want cork but it would have been well over $2500, too much for my budget.
But "life happens" again and we discovered that the concrete floor was too uneven to install the laminate overtop. So..... Sean, my son-in-law, who is doing an awesome jobe, is getting ready to install an entire plywood floor over the the concrete. But that has to wait for the mudding and taping...... did I mention that I wanted this all done in 16 days? NOT GOING TO HAPPEN!
Today, my beloved husband is doing the final sanding of the ceiling, after he removed the "popcorn" stuff from the 70's, yech! Don't ever put that stuff up!!!
Now we're off to Benjamin Moore with out $5.00 coupons for paint colours....but no painting til next week, I guess!

The old panelling is down and ready for insulation and drywall.

My sewing room is now the dinning room table!

Wednesday, May 2, 2012

Studio Renovation Begins!

I've spent the last week packing up my studio, boxes and boxes of books, supplies, notions, threads and more. My entire studio is being renovated and I'm thrilled about the new possibilities! But......the "short term" pain is excruciating! There are boxes, pieces of furniture, icky carpet and scraps of wood to deal with.
I've actually spent about 6 months planning this renovation, measuring my square footage, making floor plans, drawing out possible layouts and purging out the stuff I no longer use. That was a freeing experience to let go of fabric, designs and more from a former business and planning the way forward for my dreams and plans. I'll be showing more of that a bit later on.
I've scheduled about 16 days for the reno, which my husband and son-in-law have said is unrealistic, but I do need to get back into the space as soon as I can! I'll be having separation anxiety!
The plan over the next couple of days is to pull down the panelling from one wall, its old mahogany that shows little holes where my husband used a pellet gun when he was young (and reckless!), he also found fire crackers that he tried to stuff into the holes! Next the old carpeting will be lifted and disposed of, no more carpet, hurray! Then there'll be insulation and drywall put up where the panelling was - only along one exterior cement wall - I think it'll be warmer in the winter.


The old wall is removed, we found old growth fir used as support for the panelling.

My sewing machine is in the midst of the rubble, I'm thinking optomistically that I might get some sewing done!

One bedroom with about 30 boxes of supplies piled into it!


Fabric storage is piled to the ceiling!

More updates as the work progresses!


Friday, March 23, 2012

Studio Design and Makeover

I'm going to be doing a major studio redesign later this spring and the planning is definitely the most important factor in all of this....first question is where am I putting all the "stuff" when I lay the new flooring????


So in the lead up to the major work, I'd love to hear from you about your studios and where you work.....

I'm thinking of several blog posts with pictures and comments about your studios. I think this could be a great sharing experience. How about you?

My first topic is flooring. Personally I'm torn between laminate or cork. the studio is in the basement with a concrete floor, so I need something with a bit of a cushion. what do you have for your floor?

Email me at info@susanpm.com, post on my blog or on Facebook with your ideas. I'll be compiling all the comments in a longer blog post shortly.

Thursday, March 1, 2012

New Ironing Surface

Only quilters could get excited about ironing surfaces....right? I'm starting a gradual redesign of my studio and we took a weekend trip to IKEA to pick up a few things. I bought a small kitchen island with wheels on one end so I can move it around my studio. You can check out the island here at the IKEA site: http://www.ikea.com/ca/en/catalog/products/80035920/


Don't you love the drawers and storage shelves too???

I added three layers of batting and two layers of muslin (separately so I can change the muslin when it gets dirty). And I'm thrilled with my 680 sq. inches of pressing surface!!!!