I am one of those natural born organizers. I really enjoy figuring out the best way to arrange a room and the best way to organize stuff. It is like a big puzzle that has a best solution. I am an engineer and I have worked for over 20 years optimizing factory work by planning lean work flow, along with storing tools, plans, and supplies right where they are needed. These principles are universal and I found out that I saw things just a bit differently than other quilters as a result of these experiences. My book “Creating Your Perfect Quilting Space” was a combination of all my passions, organizing, quilting, and helping others.
What do you like best about your work?
I love helping people! It gives me great joy to hear from a quilter after she takes my class or attends my lecture, that I changed her life. Often the cathartic affect of improving her quilt studio, kicks off a highly productive and creative phase for the quilter. Sometimes these quilters go on to improve other rooms in their house. Others jump into a new activity, like teaching or hosting groups in their quilt study. One of my favorite stories was from Terry Martin, whose quilt studio is seen on the cover of my book. Terry shared with me that she felt isolated in her studio and that neither her teenage daughter nor her husband stayed very long when they dropped in. Well there were no comfortable chairs and the space was not welcoming to visitors. So we added a loveseat and TV, positioning Terry’s sewing table such that she could watch while she sewed. She said the first time she was watching old movies and sewing, her daughter stopped by and just sat down to watch with her. They chatted and laughed while enjoying an afternoon together. Terry said it was all worthwhile to spend quality time with her daughter.
How can I plan my studio before I start moving things around?
I highly recommend planning first before moving furniture. In my book I tell you to draw your studio to scale and cut out index card models of your furniture in order to try different layouts without moving furniture. Many quilters find my Quilt Studio Planner with scaled furniture models included and my half pica scale to be a great shortcut. I challenge quilters to create seven different viable layouts and take a photograph of each. Print the photos out and spend some time gazing at them and deciding which layout is the best (just like you would spend time deciding how to lay out your blocks on a quilt). Your husband or son will thank you for only have to move the real furniture once and being sure everything fits once it is moved!
What are quick things I can do right now to make my Studio work well?
1. Fold your fabric and store it on shelves where you can see it. I demonstrate fabric folding as a part of my lecture. Fabric is what inspires you to create quilts. You need to get that same feeling that you get when you walk into a fabric store when you walk into your own quilt studio. Fabric fuels your passion and energy, clutter saps it.
2. Sign up for my monthly newsletter at my website: http://www.clearview-designs.com/
What are the most common mistakes quilters make when planning their studios?
1. “Circle the wagons” – I heard this term when watching a HGTV show on home décor. It is used to describe positioning furniture against the outer walls of the room, leaving the floor at the center empty. It is as if the room was spun in a big centrifuge and the furniture was pushed to the outside. This is very inefficient use of space. The use of peninsulas and islands produce much better flow and efficiency.
2. Too much horizontal surface. Quilters think that the reason their horizontal surfaces are piled under is because they don’t have enough surfaces. Well the opposite is true. The more horizontal surfaces you have, the more you tend to pile things on them. Instead go vertical with storage. You will have a lot less clutter and be able to find things when you need them.
3. Furniture without storage. Quilters use ironing boards that take up floor space and provide no storage. Instead use a buffet or dresser with lots of drawers to hold your pressing surface.
4. Using poor ergonomics by having wrong height surfaces and office chairs not designed for sewing posture. In my book I tell you how to measure for good ergonomic heights. Be aware that office chairs do not come far enough forward to meet your back when you are in “sewing position”. I offer the Heavenly Sewing Chair at my website which is a fantastic chair for quilters. It is built custom for you with your choice of fabric. I had the pleasure of helping a consulting client who is also a medical doctor. She was blown away by the improvements she experienced when her ergonomic issues were resolved. She was amazed that with all her medical knowledge, it was simply choosing the right furniture that improved her quality of her sewing experience.
I hope you have enjoyed some of the ideas that Lois has presented to us, I know that I have followed many of her suggestions and found them to be so useful. I'll be addressing some of them over the next few blog posts and I hope you'll get some ideas as well.
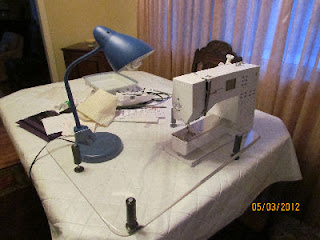
PS. the photos above are not my studio!


